If you are just starting to dabble with Windows Server 2012 just as I am, Windows Server Core is a very lightweight install with access
limited to PowerShell and command-line. Minimal installation has
limited access to Control Panel and MMC. The full Windows Server
2012 installation has full GUI access. Windows Server Core is the most efficient (in my opinion) and that is the focus here for this installation.
To get started open a command prompt and type sconfig (see below), then select option 7. Enable Remote Desktop (disabled by default); you will be prompted to enable it by
typing "E" for enable.
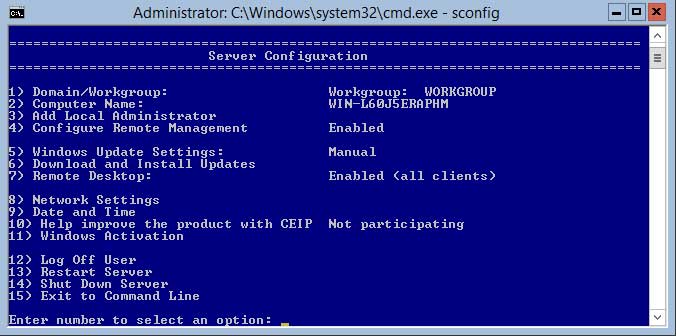 |
| 'sconfig' Options | | | | | | | |
|
|
|
|
Use Option 8 to configure your network settings (static IP requirement); this is a prerequisite for the installation of Hyper-V.
Sconfig will also allow you to change the hostname and adjust the date & time. Once you have met all the necessary prerequisites enter the following command to install the Hyper-V role:
dism /online /enable-feature /FeatureName:Microsoft-Hyper-V
The installation will begin (see below) and upon completion you will
be prompted to restart the server in order to complete the setup. (I always reboot my Windows Server after an installation whether it prompts me or not; habit I've had for some time now.)
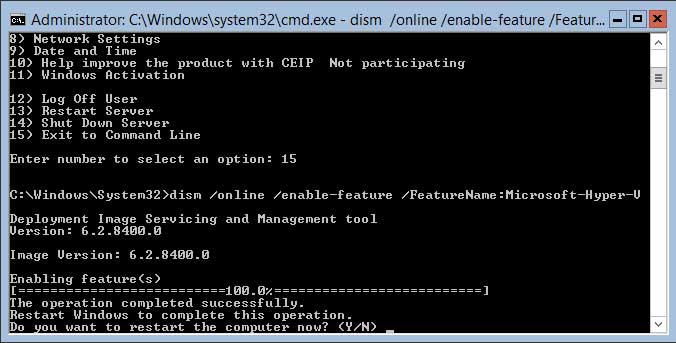 |
| Hyper-V Install |
Another handy little tool for you is the Minimal Server interface. It gives you a GUI but no start menu, desktop, web browser or Windows Explorer. However, Microsoft Management Console
and a subset of the Control Panel are available. Hyper-V Manager can be launched from a command line by typing virtmgmt.msc.
Any questions please feel free to hit me up at jkozej@anexinet.com