With more companies embracing cloud delivery models and
employees demanding access to information across a variety of mobile devices,
IT organizations have been challenged with the daunting task of how to balance
these new demands with existing corporate policies on security and data leakage
protection. One option would be to limit access and require users to utilize
traditional VPN solutions under tight control of network administrators.
Another would be to allow users to manage their own access with services such
as Dropbox or Google Drive. Neither of these options satisfy the needs of both
workers and management. Enter Citrix’s ShareFile with Local Storage Zones. Having been using the cloud-hosted version of
the solution for the past couple of months, we were looking forward to this
welcome addition. I have to say that the setup was straight forward and it has
provided everything it promised.
The prerequisites are a public URL, a signed SSL cert,
Windows 2008 Server and a CIFS share accessible from the server. Before you
begin, the IIS environment should be prepped with the proper SSL installation
and bindings. After downloading and installing the small executable on the
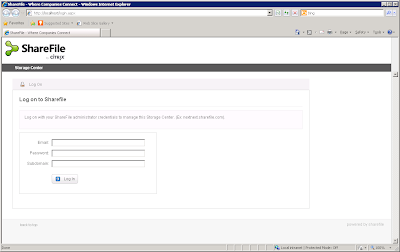
server you’re prompted to log in to your existing ShareFile account.
After logging in you’ll be presented with a very simple
configuration page where you will enter some basic information…
The zone will be prepopulated based on your ShareFile
account. Your Hostname will be the server you’ve installed the ShareFile
Storage Zones software on, the external URL you’ve previously set up, and the
UNC path to the CIFS share where the ShareFile data will live. If all of the
settings are correct, you’ll be greeted with a confirmation window like this…
We can further confirm the successful storage zones
configuration by logging into the ShareFile site, going to the admin section,
and selecting the “Storage Zones” link. If all went well, you should see your
newly created storage zone like this.
You can check the health and status of the zone by clicking
on the name to bring up a dashboard-like screen. You can see that at this point
there are no folders or data on the storage zone.
Creating folders and uploading data in the storage zone is
as simple as can be. Simply navigate to the home directory and click the “Add
Folder” button. You’ll notice that you have an option that was not present with
the cloud only solution.
Using the dropdown you can now see your storage zone
available to host the folder and its data. Proceeding with the folder creation
we can now upload data to the local storage zone. Before we upload the data we take a look at
the CIFS share itself and take note of the folder structure. We see that among
the folders is one called “persistentstorage”, which then has an empty subfolder
using a random string for its folder name.
We then upload a file about 1MB is size and see it
successfully listed in our ShareFile site.
If we go back to the folder view on the CIFS share we can
now see that the previously empty folder now contains data equivalent to the
size of the PDF document we just uploaded.
Management of the new storage zones can be determined on a
user-by-user basis as well. In addition to the previously available options,
you can now define each user’s default storage location (cloud or local), their
folder creation rights and whether or not the employee can use the local
storage zones for folders.
Whether your organization is trying to deal with the growing
use of unsecured public cloud storage or simply looking for a robust data
solution to compliment an existing Citrix environment, the new ShareFile with
Local Storage Zones provides a secure, easy to manage, flexible solution that
can meet those needs. Please contact us to discuss how this technology can
benefit your organization.
Labels: Citrix, cloud file services, Dropbox, sharefile, storage zones


